Top 10 Ways to Extend the Life of Injection Moulds?

Time:2026-10-24 Author:Aria
0%

Extending an injection mould’s service life requires more than occasional cleaning. It demands disciplined maintenance, accurate process control, and careful observation during every production shift. This guide, Top 10 Ways to Extend the Life of Injection Moulds, explains practical methods used by experienced mould technicians and production teams. The central question is simple: How to extend the life of injection moulds? The answer begins with protecting the mould from avoidable wear.

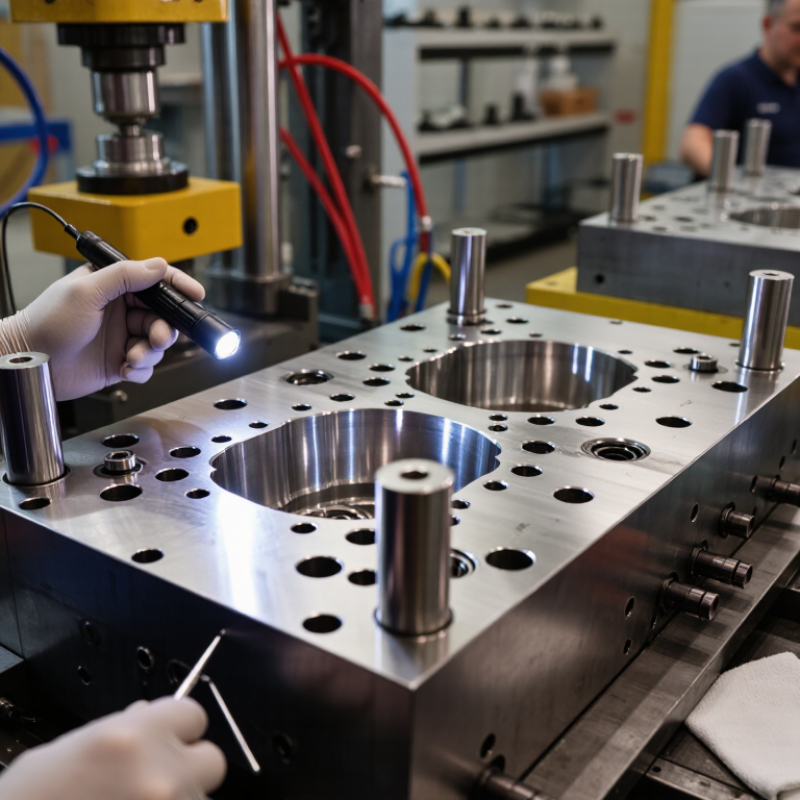
Small details often reveal larger problems. Resin residue around vents can restrict airflow and cause burn marks. Blocked cooling channels can create uneven temperatures and longer cycle times. Misalignment may leave bright rubbing lines on guide pins and bushings. Operators should inspect these areas, record cycle counts, and follow the mould maker’s maintenance recommendations. Qualified technicians should check polishing, parting lines, ejector systems, and steel condition at planned intervals.

No maintenance plan is perfect. A rushed cleaning job can damage a delicate cavity surface. Excessive polishing can also change part dimensions. These risks make documentation and measured decisions essential. The following methods focus on realistic improvements, including correct lubrication, controlled clamping force, clean cooling water, suitable mould materials, and timely repairs. Some factories may need to adapt the advice to their resin, tooling design, and production volume. That reflection matters. Long mould life depends on consistent habits, not one impressive repair.
Top 10 Ways to Extend the Life of Injection Moulds?

Understand the Factors That Affect Injection Mould Lifespan

Injection mould life depends on more than steel hardness. Cycle count, resin type, mould temperature, clamping force, and maintenance quality interact every day. Industry benchmarks commonly place production mould life between 100,000 and 1,000,000 cycles, but abrasive or glass-filled materials can shorten it sharply. The Polymer Composites Industry Report notes that mineral and glass reinforcements increase wear on gates, runners, and cavity surfaces. Small particles can behave like sand.

Heat is another quiet factor. Repeated thermal cycling causes expansion, contraction, and fatigue around corners, weld lines, and cooling channels. ISO 20457 moulding guidance stresses controlled processing conditions and dimensional stability. In practice, cooling water with scale or corrosion raises local temperatures. A blocked channel may leave one cavity visibly dull before operators notice the temperature change.

Maintenance records reveal the real story. A 2023 maintenance benchmarking report from a leading manufacturing research institute found that planned maintenance can reduce unplanned downtime by roughly 20–30 percent across production assets. That figure is not mould-specific, so it needs caution. Still, the principle is useful: cleaning vents, checking ejector pins, polishing damaged surfaces, and measuring shutoff wear prevent minor defects from becoming repairs. Avoid excessive polishing. It can change parting-line geometry and create flash. Sometimes, the maintenance team fixes the symptom and quietly damages the mould.

Choose Suitable Materials and Designs for Long-Term Mould Performance

Top 10 Ways to Extend the Life of Injection Moulds

Choose Suitable Materials and Designs for Long-Term Mould Performance

Mould life begins with steel selection, not maintenance. Hardened tool steel suits abrasive glass-filled polymers and high-volume production. Pre-hardened steel can work well for lower volumes and simpler parts. According to ASTM A681 material guidance, hardness and toughness must be balanced, because maximum hardness alone can increase cracking risk. A mould that survives 500,000 cycles is not automatically successful if repairs interrupt production.

Design details matter every day. Use generous radii around corners, balanced cooling channels, and uniform wall thickness where possible. Sharp cavity edges behave like tiny stress concentrators. Poor venting leaves burn marks near the final fill area. The 2023 Plastics Industry Association report valued U.S. plastics industry shipments at more than 548 billion dollars, showing the scale of production pressure behind reliable tooling. Small design errors can become expensive at that scale.

Polymer choice also changes wear. Glass fibre, mineral fillers, flame retardants, and recycled content may increase abrasion or corrosion. Specify protective inserts near gates, slides, and shut-offs when testing suggests concentrated damage. Thermal simulation can reveal hot spots before steel is cut. Still, simulation is not perfect. Real resin batches, operators, and cleaning habits can disagree with the model. Record cycle counts, cooling temperatures, flash locations, and polishing dates. Those simple records often reveal the real cause of premature failure.

Apply Proper Mould Setup, Handling, and Operating Procedures

Top 10 Ways to Extend the Life of Injection Moulds

A mould lasts longer when setup procedures are treated as engineering work, not routine preparation. Clean the parting line, vents, and locating surfaces before installation. Even a thin plastic film can prevent accurate closure. Check alignment, clamp force, and ejector movement at low speed. Never force a stiff component. That usually hides a larger problem.

Set barrel temperature, mould temperature, injection speed, and pressure within approved process limits. Excessive pressure can damage cavities, slides, and guide systems.

Confirm cooling channels are open and free from scale. Stable cooling also reduces warping and thermal fatigue.

Tips: Use a written setup checklist. Record the mould number, cycle settings, cooling temperature, and inspection results. Apply only the specified lubricant to moving parts. Too much lubricant attracts dust and contaminates surfaces.

During handling, use rated lifting equipment and protect guide pins with clean covers. Avoid dragging the mould across metal tables. Small impacts can create invisible alignment errors.

Operate with steady cycles instead of frequent manual adjustments. Watch for unusual noise, flashing, sticking parts, or rising ejection force. Stop and investigate early.

Clean vents at scheduled intervals, even when parts still look acceptable. Inspect inserts, screws, springs, and cooling fittings during planned maintenance.

Store the mould dry, closed, and supported evenly after cleaning. A detailed service record helps identify repeated wear patterns. Still, records can be incomplete. Review them against actual mould conditions. A careful operator may notice what a checklist misses.

Build a Preventive Cleaning, Lubrication, and Inspection Routine

Top 10 Ways to Extend the Life of Injection Moulds?

A preventive routine starts before the mould enters storage. Clean resin residue from vents, parting lines, and ejector pins after each production run. Use lint-free cloths and non-abrasive tools. Scratches can become flash points later. Dry every surface completely. Then apply a compatible rust preventive to exposed steel. Keep it controlled.

Lubrication needs discipline, not guesswork. Follow the mould builder’s specification for grease type, quantity, and interval. Excess grease can attract dust and restrict ejector movement. Inspect guide pillars, bushes, slides, and lifters during every service. Look for scoring, discoloration, unusual resistance, and coolant leaks. Record cycle counts, findings, and replaced components. The U.S. Department of Energy’s Operations and Maintenance Best Practices Guide reports that preventive maintenance can reduce costs by 12–18% compared with reactive maintenance. That figure covers industrial equipment broadly, not moulds specifically, but the principle remains relevant.

Inspection records should trigger action, not simply fill a spreadsheet. The Society for Maintenance and Reliability Professionals identifies planned maintenance, schedule compliance, and failure history as core reliability measures. Set practical limits for vent depth, wear, corrosion, and alignment. A small inspection mirror helps reveal trapped material inside narrow cavities. Do not ignore minor flash. It often signals developing damage. Some routines fail because technicians rush the final cleaning step. That weakness deserves honest review. A monthly audit can compare photographs, cycle data, and repair costs, then adjust the routine.

Top 10 Ways to Extend the Life of Injection Moulds

Recommended preventive-maintenance intervals for cleaning, lubrication, inspection, corrosion control, and mould protection. Actual intervals should be adjusted according to material, cycle count, operating conditions, and mould design.

Key principle: Frequent cleaning, correct lubrication, early wear detection, and proper storage help reduce corrosion, flash, dimensional drift, unplanned downtime, and premature mould replacement.

Repair Wear Early and Document Every Mould Maintenance Activity

A mould rarely fails without warning. Small flashes along the parting line, cloudy vents, and uneven ejection often appear first. Inspect these areas after each production run, especially when shot count rises quickly. A ten-minute check can reveal worn inserts, damaged guide pins, or blocked cooling channels. Do not wait for defective parts to expose the problem.

Repair wear early, but measure before replacing components. Use a feeler gauge, microscope, or micrometer to confirm the change. Record the damaged location, measured size, material used, and technician’s name. Photograph the area before and after repair. These details help maintenance teams repeat successful work and question weak decisions. A polished cavity may look perfect, yet its cooling performance can still be poor.

Every mould needs a clear history. Log cleaning dates, lubrication points, torque settings, shot counts, and spare-part changes. Note the resin grade and any unusual temperature or pressure readings. One missing detail can make a later failure difficult to diagnose. We once recorded a repair but forgot the final alignment measurement. The mould ran well, then developed uneven flash weeks later. That mistake changed our procedure: no mould returns to production without a signed dimensional check. Keep records near the mould or in a controlled digital system, and review recurring wear instead of treating each repair as an isolated event.

Top 10 Ways to Extend the Life of Injection Moulds? – Repair Wear Early and Document Every Mould Maintenance Activity
No. Maintenance Method Recommended Timing What to Inspect or Do Early-Wear Indicator Recommended Record Priority
1 Clean the mould after production At the end of each production run Remove resin residue, dust, oil, and deposits from the cavity, core, parting line, vents, and runner areas using mould-safe cleaning materials. Flash, burn marks, blocked vents, sticking parts, or visible residue Cleaning date, mould ID, shot count, cleaning method, and technician High
2 Lubricate moving components correctly According to the maintenance schedule and after cleaning Apply a suitable, controlled amount of lubricant to guide pillars, bushes, slides, lifters, ejector components, and other specified moving surfaces. Abnormal noise, increased mould force, uneven movement, scoring, or lubricant contamination Lubricant type, application points, quantity or method, date, and operator High
3 Check and clean cooling channels At planned intervals and whenever cycle time or cooling performance changes Verify water flow, temperature stability, hose condition, fittings, and signs of scale, rust, blockage, or leakage in the cooling circuit. Longer cycle time, uneven shrinkage, temperature variation, corrosion, or reduced water flow Flow or temperature readings, leak status, channel condition, and corrective action High
4 Inspect the parting line and shut-offs During every scheduled preventive inspection Check for dents, burrs, mismatch, trapped material, and damage at the parting line, core shut-offs, cavity shut-offs, and sealing surfaces. New flash, parting-line witness marks, dimensional drift, or visible impact damage Inspection photos, affected location, measured mismatch, repair decision, and completion date High
5 Monitor vents and prevent gas-related damage When burn marks, short shots, or filling changes appear; verify during planned inspections Clean vent lands and vent grooves, confirm adequate vent depth and location, and check for blocked or damaged venting surfaces. Dieseling, burn marks, trapped gas, short shots, or increased injection pressure Vent locations checked, defect observed, cleaning or rework completed, and mould condition afterward High
6 Measure critical dimensions and cavity wear At defined shot-count intervals and after quality deviations Measure critical cavity, core, insert, shut-off, and ejector dimensions against the approved mould drawing or inspection standard. Part dimensions approaching tolerance limits, inconsistent wall thickness, or repeated quality variation Measurement equipment, measured value, tolerance, inspector, date, and trend over time High
7 Inspect ejector, slide, and lifter systems During preventive maintenance and whenever parts stick or eject unevenly Check alignment, straightness, return action, wear marks, fasteners, springs, and clearance on ejector pins, slides, lifters, and related components. Ejector marks, pin breakage, slow return, sticking, abnormal wear, or incomplete mould opening Component condition, clearance or alignment result, replaced parts, and functional test result High
8 Protect steel surfaces from corrosion Before storage and whenever the mould is exposed to moisture or corrosive materials Dry the mould thoroughly, apply an appropriate corrosion preventive to exposed steel, and protect water ports and precision surfaces during storage. Discoloration, pitting, surface rust, damp packaging, or corrosion around cooling connections Storage date, protection product, drying confirmation, packaging condition, and next inspection date High
9 Check alignment, clamping, and mounting surfaces After relocation, a collision, abnormal mould movement, or at scheduled overhaul Inspect locating rings, clamp areas, support surfaces, guide systems, mould plates, and fasteners for damage, distortion, contamination, or looseness. Parting-line mismatch, uneven wear, mould movement, abnormal noise, or damage after a machine event Mounting inspection, fastener check, alignment result, machine event details, and approval for production High
10 Use a complete mould history and repair log After every inspection, repair, trial, and production run Maintain one controlled record containing shot count, defects, maintenance work, replaced components, measurements, photographs, approvals, and next due date. Repeated failures, unknown repair history, overdue tasks, unexplained downtime, or inconsistent maintenance quality Mould ID, date, shot count, issue, root cause, action taken, parts used, person responsible, and verification result Medium
Maintenance intervals should be adjusted according to mould design, resin type, glass-fibre content, operating conditions, production volume, and the mould maker’s approved maintenance standard.

FAQS

How should mould steel be selected for long service?

Hardened tool steel suits abrasive polymers and high-volume production. Pre-hardened steel fits simpler parts and lower volumes. Maximum hardness is not always safest.

Why do mould design details affect service life?

Generous corner radii reduce stress concentration. Balanced cooling limits thermal fatigue. Uniform walls help reduce warping and uneven shrinkage.

What problems can poor venting cause?

Blocked vents can leave burn marks near the final filling area. Clean vents regularly. Parts may look acceptable while damage is developing.

How can polymer composition increase mould wear?

Glass fibres, mineral fillers, flame retardants, and recycled content may increase abrasion or corrosion. Protective inserts can help near gates and shut-offs.

Can thermal simulation prevent mould failures?

Simulation can reveal hot spots before steel is cut. It is useful, but imperfect. Resin batches and operator habits may differ from predictions.

What should operators check before installing a mould?

Clean the parting line, vents, and locating surfaces. Check alignment, clamp force, and ejector movement slowly. Never force a stiff component.

How can operating settings protect the mould?

Keep temperature, speed, pressure, and cooling within approved limits. Excessive pressure can damage cavities and guide systems. Stable cooling matters.

What handling practices reduce accidental damage?

Use rated lifting equipment and clean covers for guide pins. Do not drag the mould across metal tables. Small impacts can cause hidden alignment errors.

Which warning signs require immediate investigation?

Stop when you notice unusual noise, flashing, sticking parts, or rising ejection force. Investigate early. Waiting often makes repairs harder.

What records help extend mould life?

Record cycle counts, cooling temperatures, flash locations, and polishing dates. Include inspection results and service details. Records can be incomplete, so compare them with actual conditions.

Conclusion

How to extend the life of injection moulds? The answer begins with understanding the conditions that cause premature wear, including moulding pressure, temperature changes, material selection, cycle frequency, and poor alignment. A durable mould should be designed with suitable steel, efficient cooling, proper wall thickness, reliable ejection, and easy access for future maintenance. Correct setup and careful handling are equally important, as excessive force, improper clamping, and incorrect operating parameters can quickly damage critical surfaces and components.

Long-term performance also depends on a consistent preventive maintenance routine. After production, remove residue and contaminants, apply suitable lubrication to moving parts, and inspect vents, cooling channels, guide systems, cavities, and cores for early signs of damage. Small issues such as scratches, corrosion, flashing, or loose components should be repaired before they become costly failures. Finally, record every cleaning, inspection, repair, and production cycle so maintenance decisions are based on clear history. This systematic approach improves mould reliability, reduces unexpected downtime, and supports stable product quality over many production cycles.

Aria

Aria

Aria is a dedicated marketing professional with a deep passion for innovative strategies and a keen understanding of our company's product offerings. With a wealth of experience in the industry, Aria excels at crafting engaging content that highlights the unique features and benefits of our......